[ethereum] hardhat을 이용하여 스마트 컨트랙트 개발하기
지난 시간에 truffle을 이용하여 스마트 컨트랙트 개발하는 방법을 소개했습니다.
2022.08.28 - [블록체인] - [ethereum] truffle을 이용하여 스마트 컨트랙트 개발하기
[ethereum] truffle을 이용하여 스마트 컨트랙트 개발하기
ruffle을 이용하여 스마트 컨트랙트를 개발하는 방법을 다룹니다. ● 셋업 $ npm install -g truffle · 프로젝트 생성 $ mkdir dapp $ cd dapp $ truffle init init 명령어를 사용하여 truffle 기반의 프로젝트를..
meongae.tistory.com
추가적으로 출금패턴(withdrawals patterns)을 truffle을 활용하여 다뤄보기도 했습니다.
2022.08.28 - [블록체인] - [ethereum] solidity withdrawals pattern(출금패턴)
[ethereum] solidity withdrawals pattern(출금패턴)
solidity에서 출금패턴을 다뤄보겠습니다. 제가 이 포스팅을 위해 삽질한 과정을 보고 싶다면 여기로 오시면 되겠습니다. 약 2시간 30분동안 삽질을 하였습니다. ☞ 목차 1. 준비 2. 입/출금 가능한
meongae.tistory.com
이번글에서는 truffle을 대체할수 있는 hardhat을 이용하여 스마트 컨트랙트 개발하는 방법을 소개합니다.
● 셋업
hardhat을 이용하여 개발할 수 있는 환경을 구축합니다.
· 프로젝트 생성
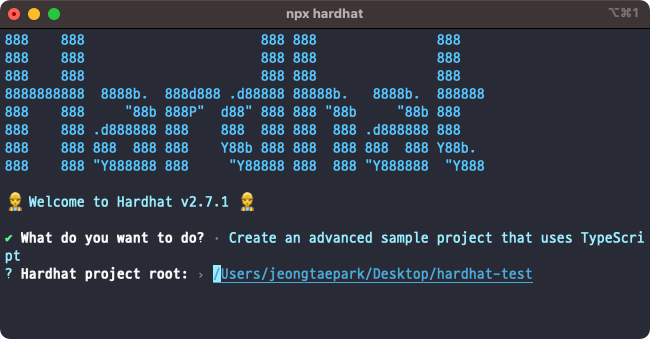
$ mkdir hardhat-test
$ cd hardhat-test
$ npm install --save-dev hardhat$ npx hardhat
어떤 형태의 프로젝트를 생성할 지 묻습니다.
저는 여기서 세 번째 Create an advanced sample project that uses TypeScript를 선택하도록 하겠습니다.
선택을 하면 3가지를 더 묻습니다.
프로젝트 루트 경로
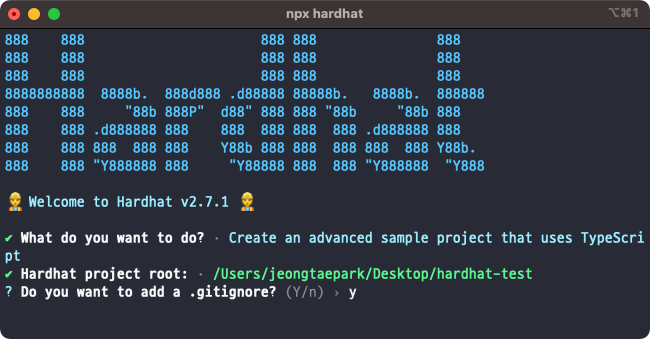
.gitignore 추가유무
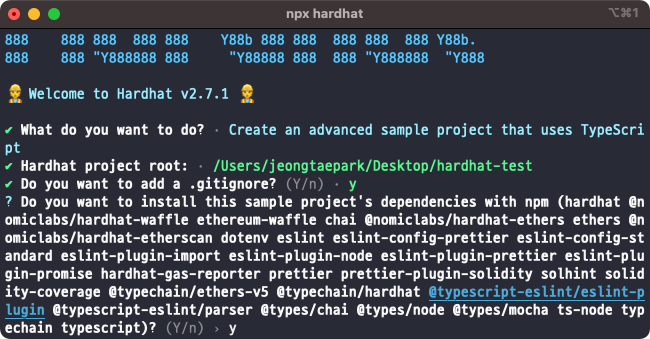
의존성 모듈 설치
마지막의 의존성 모듈은 typescript 기반으로 생성했으므로 typescript 관련된 의존성을 추가합니다.
$ tree . -I node_modules
.
├── README.md
├── contracts
│   └── Greeter.sol
├── hardhat.config.ts
├── package-lock.json
├── package.json
├── scripts
│   └── deploy.ts
├── test
│   └── index.ts
└── tsconfig.json

3 directories, 8 files
▶ contracts
스마트 컨트랙트 코드를 관리합니다.
▶ scripts(truffle에서 migrations 역할을 수행합니다.)
스마트 컨트랙트 배포를 관리합니다
▶ test
테스트 코드를 관리합니다.
▶ artifacts, cache
컴파일 결과를 관리합니다.
▶ hardhat.config.ts
네트워크 연결정보 및 solidity compiler 버전 정보 등을 관리합니다.
import * as dotenv from "dotenv";

import { HardhatUserConfig, task } from "hardhat/config";
import "@nomiclabs/hardhat-etherscan";
import "@nomiclabs/hardhat-waffle";
import "@typechain/hardhat";
import "hardhat-gas-reporter";
import "solidity-coverage";

dotenv.config();

// This is a sample Hardhat task. To learn how to create your own go to
// https://hardhat.org/guides/create-task.html
task("accounts", "Prints the list of accounts", async (taskArgs, hre) => {
  const accounts = await hre.ethers.getSigners();

  for (const account of accounts) {
    console.log(account.address);
  }
});

// You need to export an object to set up your config
// Go to https://hardhat.org/config/ to learn more

const config: HardhatUserConfig = {
  solidity: "0.8.4",
  networks: {
    ropsten: {
      url: process.env.ROPSTEN_URL || "",
      accounts:
        process.env.PRIVATE_KEY !== undefined ? [process.env.PRIVATE_KEY] : [],
    },
  },
  gasReporter: {
    enabled: process.env.REPORT_GAS !== undefined,
    currency: "USD",
  },
  etherscan: {
    apiKey: process.env.ETHERSCAN_API_KEY,
  },
};

export default config;
process.env는 환경변수를 가져옵니다.
hardhat은 프로젝트 생성시 .env를 생성합니다.
ETHERSCAN_API_KEY=ABC123ABC123ABC123ABC123ABC123ABC1
ROPSTEN_URL=https://eth-ropsten.alchemyapi.io/v2/<YOUR ALCHEMY KEY>
PRIVATE_KEY=0xabc123abc123abc123abc123abc123abc123abc123abc123abc123abc123abc1
hardhat은 etherscan과 연동되어 특정 액션을 수행합니다.
· 의존성 모듈 확인하기
package.json을 확인하면 앞의 명령어로 생성한 프로젝트가 얼마나 많은 라이브러리와 의존성을 가지는지 알 수 있습니다.
{
  "name": "hardhat-project",
  "devDependencies": {
    "@nomiclabs/hardhat-ethers": "^2.0.3",
    "@nomiclabs/hardhat-etherscan": "^2.1.8",
    "@nomiclabs/hardhat-waffle": "^2.0.1",
    "@typechain/ethers-v5": "^7.2.0",
    "@typechain/hardhat": "^2.3.1",
    "@types/chai": "^4.3.0",
    "@types/mocha": "^9.0.0",
    "@types/node": "^12.20.37",
    "@typescript-eslint/eslint-plugin": "^4.33.0",
    "@typescript-eslint/parser": "^4.33.0",
    "chai": "^4.3.4",
    "dotenv": "^10.0.0",
    "eslint": "^7.32.0",
    "eslint-config-prettier": "^8.3.0",
    "eslint-config-standard": "^16.0.3",
    "eslint-plugin-import": "^2.25.3",
    "eslint-plugin-node": "^11.1.0",
    "eslint-plugin-prettier": "^3.4.1",
    "eslint-plugin-promise": "^5.2.0",
    "ethereum-waffle": "^3.4.0",
    "ethers": "^5.5.2",
    "hardhat": "^2.7.1",
    "hardhat-gas-reporter": "^1.0.6",
    "prettier": "^2.5.1",
    "prettier-plugin-solidity": "^1.0.0-beta.13",
    "solhint": "^3.3.6",
    "solidity-coverage": "^0.7.17",
    "ts-node": "^10.4.0",
    "typechain": "^5.2.0",
    "typescript": "^4.5.4"
  }
}
● 개발 프로세스
일반적으로 개발이라하면 다음과 같은 프로세스에 맞춰서 개발합니다.
1. 소스코드 작성
2. 컴파일 & 빌드
3. 배포
4. 개별적으로 실행해보기
5. 테스트 하기
hardhat도 truffle과 마찬가지로 이런 일련의 과정을 코드 및 명령어 기반으로 수행할 수 있습니다.
· 소스코드 작성
소스 코드는 contracts 아래에서 관리합니다. 우리는 별도의 소스코드를 작성하지 않고 샘플로 제공하는 Greeter.sol을 이용합니다.
//SPDX-License-Identifier: Unlicense
pragma solidity ^0.8.0;

import "hardhat/console.sol";

contract Greeter {
    string private greeting;

    constructor(string memory _greeting) {
        console.log("Deploying a Greeter with greeting:", _greeting);
        greeting = _greeting;
    }

    function greet() public view returns (string memory) {
        return greeting;
    }

    function setGreeting(string memory _greeting) public {
        console.log("Changing greeting from '%s' to '%s'", greeting, _greeting);
        greeting = _greeting;
    }
}
여기서 한 가지 중요한 점은 console.log를 사용한다는 점입니다. hardhat팀은 스마트 컨트랙트 개발시 마치 자바스크립트처럼 디버깅할 수 있도록 도와주는 console.log 라이브러리를 제공하고 있습니다.
· 컴파일
$ npx hardhat compile

Downloading compiler 0.8.4
Compiling 2 files with 0.8.4
Generating typings for: 2 artifacts in dir: typechain for target: ethers-v5
Successfully generated 5 typings!
Compilation finished successfully
컴파일을 완료하면 artifacts, cache 디렉터리를 생성합니다. 만약, 컨트랙트 코드에 문제가 있다면 문제에 대한 메시지를 출력합니다.
$ tree  -I node_modules
.
├── README.md
├── artifacts
│   ├── build-info
│   │   └── f6d72e584f9c6e176d0b340e8f9097a9.json
│   ├── contracts
│   │   └── Greeter.sol
│   │       ├── Greeter.dbg.json
│   │       └── Greeter.json
│   └── hardhat
│       └── console.sol
│           ├── console.dbg.json
│           └── console.json
├── cache
│   └── solidity-files-cache.json
├── contracts
│   └── Greeter.sol
├── hardhat.config.ts
├── package-lock.json
├── package.json
├── scripts
│   └── deploy.ts
├── test
│   └── index.ts
├── tsconfig.json
└── typechain
    ├── Greeter.d.ts
    ├── common.d.ts
    ├── factories
    │   └── Greeter__factory.ts
    ├── hardhat.d.ts
    └── index.ts

12 directories, 19 files
우리가 dapp을 만들 때 필요한 요소중 하나인 ABI와 bytecode는 artifacts/contracts 아래의 우리가 작성한 solidity 파일명인 Greeter.sol 아래에서 관리합니다.
{
  "_format": "hh-sol-artifact-1",
  "contractName": "Greeter",
  "sourceName": "contracts/Greeter.sol",
  "abi": [
    {
      "inputs": [
        {
          "internalType": "string",
          "name": "_greeting",
          "type": "string"
        }
      ],
      "stateMutability": "nonpayable",
      "type": "constructor"
    },
    {
      "inputs": [],
      "name": "greet",
      "outputs": [
        {
          "internalType": "string",
          "name": "",
          "type": "string"
        }
      ],
      "stateMutability": "view",
      "type": "function"
    },
    {
      "inputs": [
        {
          "internalType": "string",
          "name": "_greeting",
          "type": "string"
        }
      ],
      "name": "setGreeting",
      "outputs": [],
      "stateMutability": "nonpayable",
      "type": "function"
    }
  ],
  "bytecode": "생략",
  "deployedByBytecode":  "생략",
  "linkReferences": {},
  "deployedLinkReferences": {}
}
truffle의 컴파일 결과보다 필요한 정보만 가지고 있어서 이 부분은 hardhat이 맘에 드는 요소중 하나입니다.
또한 해당 프로젝트를 typescript 기반으로 생성했기 때문에 typechain 디렉터리도 생성합니다.
.
├── Greeter.d.ts
├── common.d.ts
├── factories
│   └── Greeter__factory.ts
├── hardhat.d.ts
└── index.ts

1 directory, 5 files
해당 파일은 contracts 파일에 대한 인터페이스 정의입니다.
· 테스트
테스트 코드는 test에서 관리합니다. 이 부분도 샘플로 제공하는 코드를 기준으로 진행합니다.
import { expect } from "chai";
import { ethers } from "hardhat";

describe("Greeter", function () {
  it("Should return the new greeting once it's changed", async function () {
    const Greeter = await ethers.getContractFactory("Greeter");
    const greeter = await Greeter.deploy("Hello, world!");
    await greeter.deployed();

    expect(await greeter.greet()).to.equal("Hello, world!");

    const setGreetingTx = await greeter.setGreeting("Hola, mundo!");

    // wait until the transaction is mined
    await setGreetingTx.wait();

    expect(await greeter.greet()).to.equal("Hola, mundo!");
  });
});
해당 코드의 흐름은 다음과 같습니다.
▶ 1. 컨트랙트 팩토리 메서드를 이용하여 Greeter 배포객체 가져오기
const Greeter = await ethers.getContractFactory("Greeter");여기서 팩토리란 factory를 의미합니다. 프로그래밍에서 팩토리란 객체를 만드는 함수를 의미합니다.
▶ 2. 팩토리를 통해 가져온 컨트랙트 정보를 토대로 Hello world!를 초기값으로 가지는 컨트랙트 배포준비
const greeter = await Greeter.deploy("Hello, world!");▶ 3. 컨트랙트 배포
await greeter.deployed();▶ 4. 생성자에 의한 초기값 기대값 확인
expect(await greeter.greet()).to.equal("Hello, world!");▶ 5. setGreeting() 호출하여 Hello, world!를 Hola, mundo!로 변경 - 트랜잭션 발생
const setGreetingTx = await greeter.setGreeting("Hola, mundo!");▶ 6.트랜잭션이 블록에 포함할 때까지 기다림
await setGreetingTx.wait();▶ 7. 6번으로 변경한 기대값 확인
expect(await greeter.greet()).to.equal("Hola, mundo!");$ npx hardhat test
No need to generate any newer typings.
Greeter
Deploying a Greeter with greeting: Hello, world!
Changing greeting from 'Hello, world!' to 'Hola, mundo!'
✓ Should return the new greeting once it's changed (601ms)
1 passing (606ms)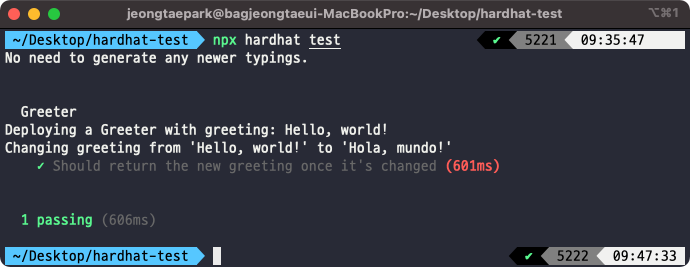
$ npx hardhat test test/index.ts특정 파일을 명시하면 특정 파일만 테스트 합니다.
· 배포
배포는 scripts에서 관리하며 run 명령어를 이용합니다. 이 또한 샘플로 제공한 deploy.ts 파일을 이용합니다.
import { ethers } from "hardhat";

async function main() {
  const Greeter = await ethers.getContractFactory("Greeter");
  const greeter = await Greeter.deploy("Hello, Hardhat!");

  await greeter.deployed();

  console.log("Greeter deployed to:", greeter.address);
}

main().catch((error) => {
  console.error(error);
  process.exitCode = 1;
});
앞의 테스트 코드에서 다뤄본 내용입니다.
한 가지 이상하다고 느낄 수 있는 부분은 다음 부분일겁니다.
main().catch((error) => {
  console.error(error);
  process.exitCode = 1;
});
이건 main() 함수의 반환 타입이 Promise 이기 때문에 then() 또는 catch()로 체이닝이 가능합니다.
배포하기 전에 해야할 작업이 있습니다.
1. 네트워크 환경 구성
2. hardhat 배포 네트워크 설정
여기선 ganache-cli로 구축한 네트워크에 배포를 진행합니다.
▶ 로컬 네트워크 구축
아마 제 블로그를 꾸준히 보신분은 ganache-cli을 어떻게 실행하는지 아실겁니다.
하지만 전 너무나 친절한 멍개이기 때문에 설치방법과 실행방법을 알려드립니다.
$ npm install -g ganache-cli # 설치

$ ganache-cli # 실행
Ganache CLI v6.12.2 (ganache-core: 2.13.2)

Available Accounts
==================
(0) 0x6b113534c1ef028e2F90d2338F491E49EB70879c (100 ETH)
(1) 0x9BEae85001A0c3F09688345145498919423b5E8C (100 ETH)
(2) 0xF7718Dd4e188C160A051834D6F37399D64b96F5A (100 ETH)
(3) 0x9d56FFe5bF0DeAF33c70883681B09ecD0F010ac4 (100 ETH)
(4) 0x7A61860f47Bc42A865d9424d8eDC70705602300e (100 ETH)
(5) 0xd673AFCD67FFD1dedc9FbAE4cEf0A08Eb0aCD13A (100 ETH)
(6) 0xab90Abfe30dcfcf0318D4985C9d3518D24b14475 (100 ETH)
(7) 0x54E2F2BBEdb351d4eD12F34B1Df83e5fc061df1C (100 ETH)
(8) 0xB70454565eA14AB414C80a540A1022Af43597628 (100 ETH)
(9) 0xD43B9c31624a17731336516b75177cCB40358741 (100 ETH)

Private Keys
==================
(0) 0x78cc9813aa135f44dcba76b1a751271591640473cf039a0efb60d27491dab144
(1) 0x84fa91cc7df9476856ae603edc3e84e3b57782f9eea37c6e2400a0c4124f8005
(2) 0xa4da287dc643a1f5732137fc5900ffe2edf09a37b3c5d281f3610a2b2c7019a1
(3) 0xc04aac3b8bf75548e52bd437546524649da52dc9ec0897041fa3f07630ad87d0
(4) 0x0608b4d7bc929e4a4f444764ca904b1942df2b198f7604f88e57697e5e76baa7
(5) 0xbfc2e7155d0b287081992e0b41bda7560e901920d8f72cd39446364bd9ed0bcf
(6) 0xfbf0fef2691d3b822daf11e2190fa506cd4eba929dcc904af39eb54b30bff59e
(7) 0x5381c52fe5a80b2bdfc831bb129ed211b131c4ec4f488756f62c64704b082ca0
(8) 0xe317b2db45f3c334c969345c25032a9ef50b04b42f87b8c53e255cd7cba01d7f
(9) 0xfe3ad5e53cfca3d36bbd11984c25f5db8a118252735ad59370f13322271f0011

HD Wallet
==================
Mnemonic:      world globe scale buddy peace position broccoli autumn move local saddle snow
Base HD Path:  m/44'/60'/0'/0/{account_index}

Gas Price
==================
20000000000

Gas Limit
==================
6721975

Call Gas Limit
==================
9007199254740991

Listening on 127.0.0.1:8545
만약, ganache-cli가 지겨우신 가요? 그렇다면 hardhat이 제공하는 노드를 이용해도 됩니다.
Started HTTP and WebSocket JSON-RPC server at http://127.0.0.1:8545/

Accounts
========

WARNING: These accounts, and their private keys, are publicly known.
Any funds sent to them on Mainnet or any other live network WILL BE LOST.

Account #0: 0xf39fd6e51aad88f6f4ce6ab8827279cfffb92266 (10000 ETH)
Private Key: 0xac0974bec39a17e36ba4a6b4d238ff944bacb478cbed5efcae784d7bf4f2ff80

Account #1: 0x70997970c51812dc3a010c7d01b50e0d17dc79c8 (10000 ETH)
Private Key: 0x59c6995e998f97a5a0044966f0945389dc9e86dae88c7a8412f4603b6b78690d

Account #2: 0x3c44cdddb6a900fa2b585dd299e03d12fa4293bc (10000 ETH)
Private Key: 0x5de4111afa1a4b94908f83103eb1f1706367c2e68ca870fc3fb9a804cdab365a

Account #3: 0x90f79bf6eb2c4f870365e785982e1f101e93b906 (10000 ETH)
Private Key: 0x7c852118294e51e653712a81e05800f419141751be58f605c371e15141b007a6

Account #4: 0x15d34aaf54267db7d7c367839aaf71a00a2c6a65 (10000 ETH)
Private Key: 0x47e179ec197488593b187f80a00eb0da91f1b9d0b13f8733639f19c30a34926a

Account #5: 0x9965507d1a55bcc2695c58ba16fb37d819b0a4dc (10000 ETH)
Private Key: 0x8b3a350cf5c34c9194ca85829a2df0ec3153be0318b5e2d3348e872092edffba

Account #6: 0x976ea74026e726554db657fa54763abd0c3a0aa9 (10000 ETH)
Private Key: 0x92db14e403b83dfe3df233f83dfa3a0d7096f21ca9b0d6d6b8d88b2b4ec1564e

Account #7: 0x14dc79964da2c08b23698b3d3cc7ca32193d9955 (10000 ETH)
Private Key: 0x4bbbf85ce3377467afe5d46f804f221813b2bb87f24d81f60f1fcdbf7cbf4356

Account #8: 0x23618e81e3f5cdf7f54c3d65f7fbc0abf5b21e8f (10000 ETH)
Private Key: 0xdbda1821b80551c9d65939329250298aa3472ba22feea921c0cf5d620ea67b97

Account #9: 0xa0ee7a142d267c1f36714e4a8f75612f20a79720 (10000 ETH)
Private Key: 0x2a871d0798f97d79848a013d4936a73bf4cc922c825d33c1cf7073dff6d409c6

Account #10: 0xbcd4042de499d14e55001ccbb24a551f3b954096 (10000 ETH)
Private Key: 0xf214f2b2cd398c806f84e317254e0f0b801d0643303237d97a22a48e01628897

Account #11: 0x71be63f3384f5fb98995898a86b02fb2426c5788 (10000 ETH)
Private Key: 0x701b615bbdfb9de65240bc28bd21bbc0d996645a3dd57e7b12bc2bdf6f192c82

Account #12: 0xfabb0ac9d68b0b445fb7357272ff202c5651694a (10000 ETH)
Private Key: 0xa267530f49f8280200edf313ee7af6b827f2a8bce2897751d06a843f644967b1

Account #13: 0x1cbd3b2770909d4e10f157cabc84c7264073c9ec (10000 ETH)
Private Key: 0x47c99abed3324a2707c28affff1267e45918ec8c3f20b8aa892e8b065d2942dd

Account #14: 0xdf3e18d64bc6a983f673ab319ccae4f1a57c7097 (10000 ETH)
Private Key: 0xc526ee95bf44d8fc405a158bb884d9d1238d99f0612e9f33d006bb0789009aaa

Account #15: 0xcd3b766ccdd6ae721141f452c550ca635964ce71 (10000 ETH)
Private Key: 0x8166f546bab6da521a8369cab06c5d2b9e46670292d85c875ee9ec20e84ffb61

Account #16: 0x2546bcd3c84621e976d8185a91a922ae77ecec30 (10000 ETH)
Private Key: 0xea6c44ac03bff858b476bba40716402b03e41b8e97e276d1baec7c37d42484a0

Account #17: 0xbda5747bfd65f08deb54cb465eb87d40e51b197e (10000 ETH)
Private Key: 0x689af8efa8c651a91ad287602527f3af2fe9f6501a7ac4b061667b5a93e037fd

Account #18: 0xdd2fd4581271e230360230f9337d5c0430bf44c0 (10000 ETH)
Private Key: 0xde9be858da4a475276426320d5e9262ecfc3ba460bfac56360bfa6c4c28b4ee0

Account #19: 0x8626f6940e2eb28930efb4cef49b2d1f2c9c1199 (10000 ETH)
Private Key: 0xdf57089febbacf7ba0bc227dafbffa9fc08a93fdc68e1e42411a14efcf23656e

WARNING: These accounts, and their private keys, are publicly known.
Any funds sent to them on Mainnet or any other live network WILL BE LOST.
여기서는 ganache-cli로 진행합니다. 사실 머로 진행하든 상관없습니다.
▶ hardhat.config.ts
hardhat에서 배포할 네트워크를 수정할 차례입니다.
import * as dotenv from "dotenv";

import { HardhatUserConfig, task } from "hardhat/config";
import "@nomiclabs/hardhat-etherscan";
import "@nomiclabs/hardhat-waffle";
import "@typechain/hardhat";
import "hardhat-gas-reporter";
import "solidity-coverage";

dotenv.config();

task("accounts", "Prints the list of accounts", async (taskArgs, hre) => {
  const accounts = await hre.ethers.getSigners();

  for (const account of accounts) {
    console.log(account.address);
  }
});

// You need to export an object to set up your config
// Go to https://hardhat.org/config/ to learn more

const config: HardhatUserConfig = {
  solidity: "0.8.4",
  networks: {
    ropsten: {
      url: process.env.ROPSTEN_URL || "",
      accounts:
        process.env.PRIVATE_KEY !== undefined ? [process.env.PRIVATE_KEY] : [],
    },
    dev: {
      url: "http://localhost:8545",
      accounts: [
        "0x78cc9813aa135f44dcba76b1a751271591640473cf039a0efb60d27491dab144",
        "0x84fa91cc7df9476856ae603edc3e84e3b57782f9eea37c6e2400a0c4124f8005",
        "0xa4da287dc643a1f5732137fc5900ffe2edf09a37b3c5d281f3610a2b2c7019a1",
        "0xc04aac3b8bf75548e52bd437546524649da52dc9ec0897041fa3f07630ad87d0",
        "0x0608b4d7bc929e4a4f444764ca904b1942df2b198f7604f88e57697e5e76baa7",
        "0xbfc2e7155d0b287081992e0b41bda7560e901920d8f72cd39446364bd9ed0bcf",
        "0xfbf0fef2691d3b822daf11e2190fa506cd4eba929dcc904af39eb54b30bff59e",
        "0x5381c52fe5a80b2bdfc831bb129ed211b131c4ec4f488756f62c64704b082ca0",
        "0xe317b2db45f3c334c969345c25032a9ef50b04b42f87b8c53e255cd7cba01d7f",
        "0xfe3ad5e53cfca3d36bbd11984c25f5db8a118252735ad59370f13322271f0011",
      ],
    },
  },
  gasReporter: {
    enabled: process.env.REPORT_GAS !== undefined,
    currency: "USD",
  },
  etherscan: {
    apiKey: process.env.ETHERSCAN_API_KEY,
  },
};

export default config;
network에 truffle.config.js와 비슷한 형태로 추가합니다. 이때 중요한 점은 accounts를 넣어줘야 합니다. accounts는 개인키(privatekey)를 넣어야 합니다.
▶ 배포
$ npx hardhat run --network dev scripts/deploy.ts

No need to generate any newer typings.
Greeter deployed to: 0x2977ae3f2C5473d6cebcfE37be94BA59ce1Dd483
deploy.ts 파일 main() 함수의 마지막의 다음과 같이 콘솔이 있어 마지막에 배포한 컨트랙트 주소를 출력합니다.
console.log("Greeter deployed to:", greeter.address);만약 배포시 hardhat.config.ts의 network에 명시한 accounts를 가져오고 싶다면 다음과 같이 가져올 수 있습니다.
import { ethers } from "hardhat";

const accounts = await ethers.getSigners();

for (const account of accounts) {
    console.log(account.address);
}
import { ethers } from "hardhat";
async function main() {
const Greeter = await ethers.getContractFactory("Greeter");
const greeter = await Greeter.deploy("Hello, Hardhat!");
const accounts = await ethers.getSigners();
for (const account of accounts) {
console.log(account.address);
}
await greeter.deployed();
console.log("Greeter deployed to:", greeter.address);
}
main().catch((error) => {
console.error(error);
process.exitCode = 1;
});다시 배포합니다.
$ npx hardhat run --network dev scripts/deploy.ts

No need to generate any newer typings.
0x6b113534c1ef028e2F90d2338F491E49EB70879c
0x9BEae85001A0c3F09688345145498919423b5E8C
0xF7718Dd4e188C160A051834D6F37399D64b96F5A
0x9d56FFe5bF0DeAF33c70883681B09ecD0F010ac4
0x7A61860f47Bc42A865d9424d8eDC70705602300e
0xd673AFCD67FFD1dedc9FbAE4cEf0A08Eb0aCD13A
0xab90Abfe30dcfcf0318D4985C9d3518D24b14475
0x54E2F2BBEdb351d4eD12F34B1Df83e5fc061df1C
0xB70454565eA14AB414C80a540A1022Af43597628
0xD43B9c31624a17731336516b75177cCB40358741
Greeter deployed to: 0x825f751DAd1Cf797DF67d604c604A58e9B49c4b0
· 콘솔모드
hardhat도 truffle처럼 콘솔모드를 지원합니다.
$ npx hardhat console --network dev
No need to generate any newer typings.
Welcome to Node.js v14.17.3.
Type ".help" for more information.
>
> const { ethers } = require('hardhat');
undefined
> (await ethers.getSigners()).slice(0, 2).map(item => item.address)
[
'0x6b113534c1ef028e2F90d2338F491E49EB70879c',
'0x9BEae85001A0c3F09688345145498919423b5E8C'
]> const Greeter = await ethers.getContractFactory("Greeter");
undefined
> const greeter = await Greeter.deploy("Hello, Hardhat!");
undefined
> const accounts = await ethers.getSigners();
> for (const account of accounts.slice(0, 2)) {
console.log(account.address);
}
0x6b113534c1ef028e2F90d2338F491E49EB70879c
0x9BEae85001A0c3F09688345145498919423b5E8C> await greeter.deployed();deployed()를 수행하면 먼가 쏼롸쏼라 많이 출력 합니다.
> console.log("Greeter deployed to:", greeter.address);
Greeter deployed to: 0x391947d818B5b4E9E9bD79600B51468771172F18
지금까지 hardhat을 이용하여 개발 - 컴파일 - 테스트 - 배포 과정을 알아보았습니다. 또한 scripts의 과정을 콘솔모드에서 직접 수행해보았습니다.
hardhat은 상당히 많은 기능을 제공합니다 .
저도 truffle에서 hardhat으로 넘어갈 생각입니다. 저도 써보면서 쓸만한 기능은 정리해서 공유하겠습니다
Hardhat | Ethereum development environment for professionals by Nomic Foundation
Hardhat is an Ethereum development environment. Compile your contracts and run them on a development network. Get Solidity stack traces, console.log and more.
hardhat.org